
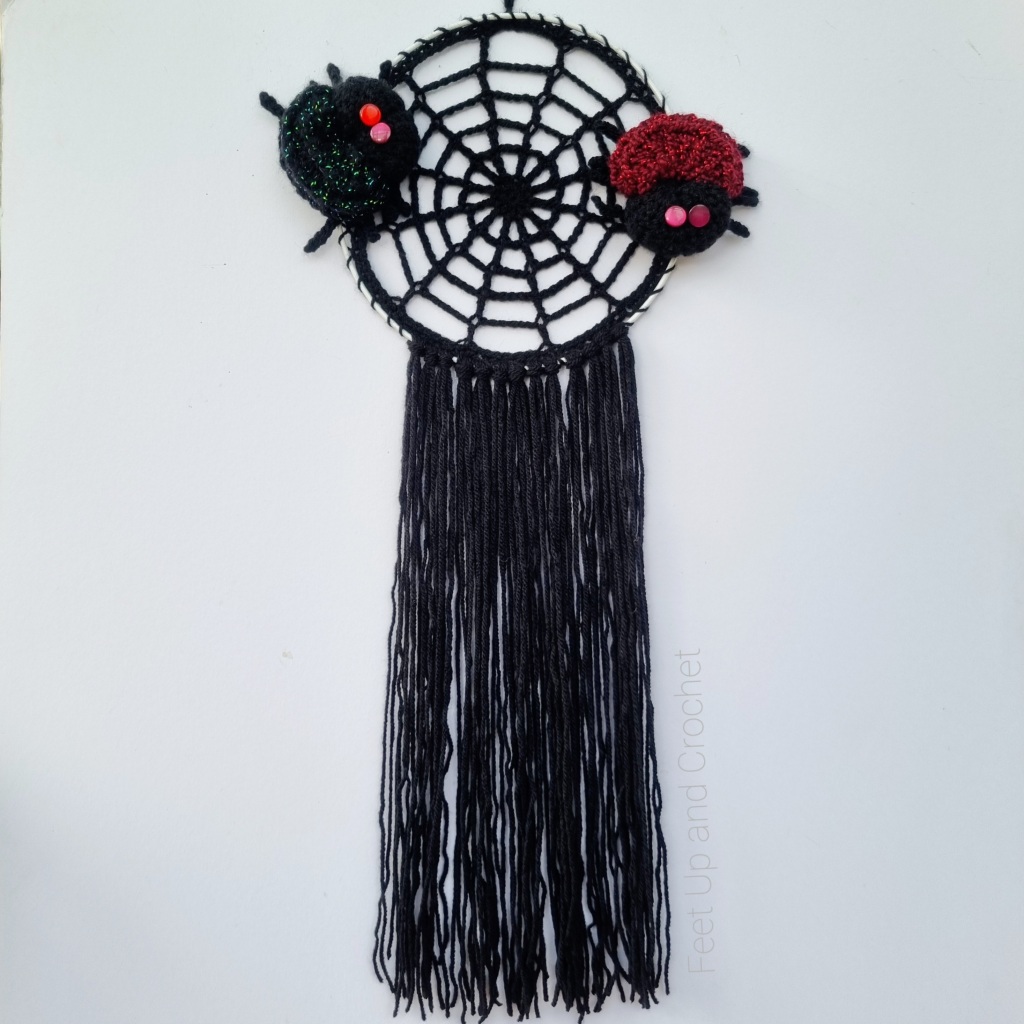
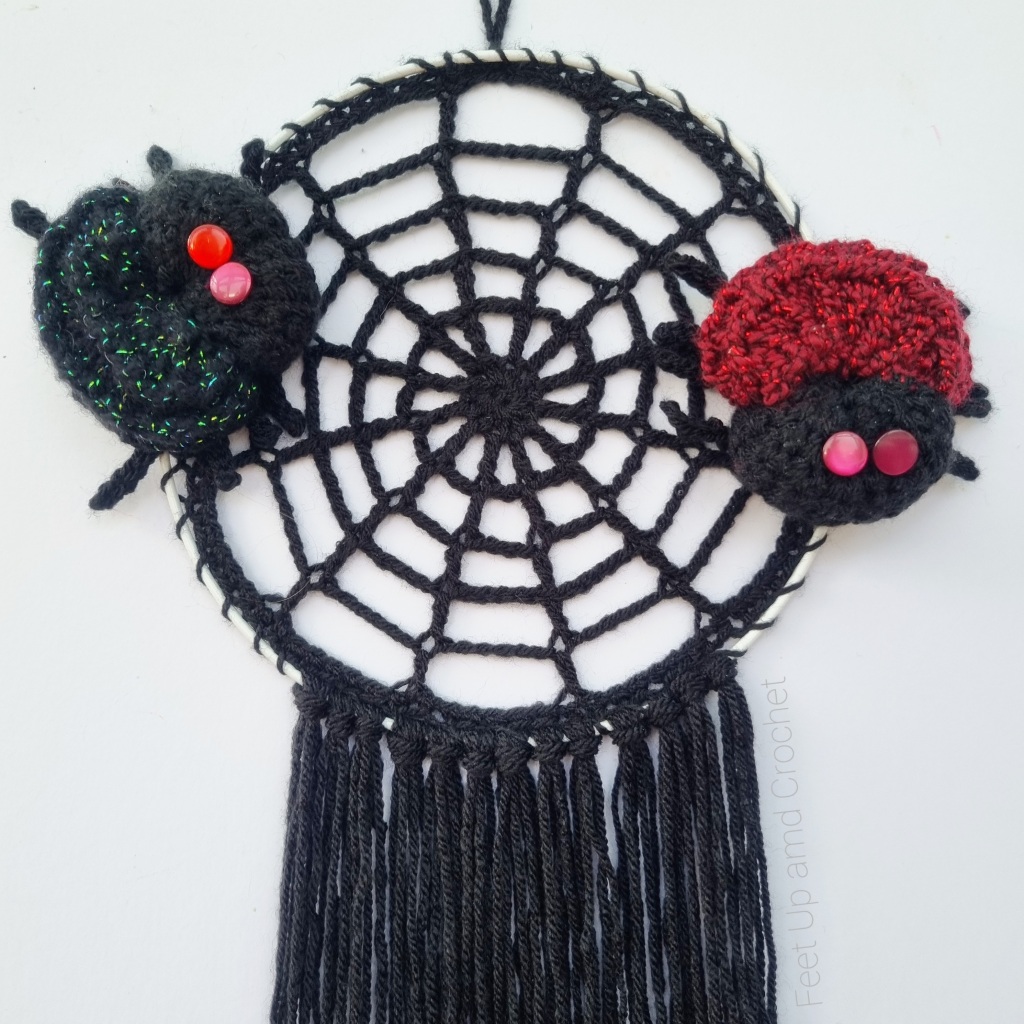
I just love a wall hanging for the home, and especially a themed one which I know the kids will enjoy too! These cute spooky spiders are easier to make than you might think, and the web can be worked up in next to no time. Tassels are optional!
The pattern below is written in UK terms and is based on DK yarn, but you can use any yarn you like!
YOU WILL NEED:
- DK black yarn – approx 40g if doing tassels (I used Stylecraft Special DK)
- Sparkly or contrasting colour yarn (optional)
- 4mm hook
- 20cm metal craft ring
- Tapestry needle
- Scissors
- A small amount of stuffing/yarn ends/fabric scraps.
- Spare buttons for the spiders eyes
DIMENSIONS:
- Each spider is approximately 7cm wide by 7cm tall
- Finished wall hanging is approximately 20cm by 58cm long
GAUGE:
Gauge is not critical for this project.
NOTES:
- Ch 1 counts as a first stitch.
- Change yarn on last yrh.
- The spider web is worked in the round, do not turn your work at the end of the
- round.
- If it helps, use a st marker or waste yarn to keep track of the first st of each rnd.
SPECIAL STITCHES AND ABBREVIATIONS:
Ch – Chain
Bptr – Back post treble crochet
Dc – Double crochet
Fptr – Front Post treble crochet
Rnd – Round
Ss – Slip stitch
Tr – Treble crochet
Yrh – Yarn round hook

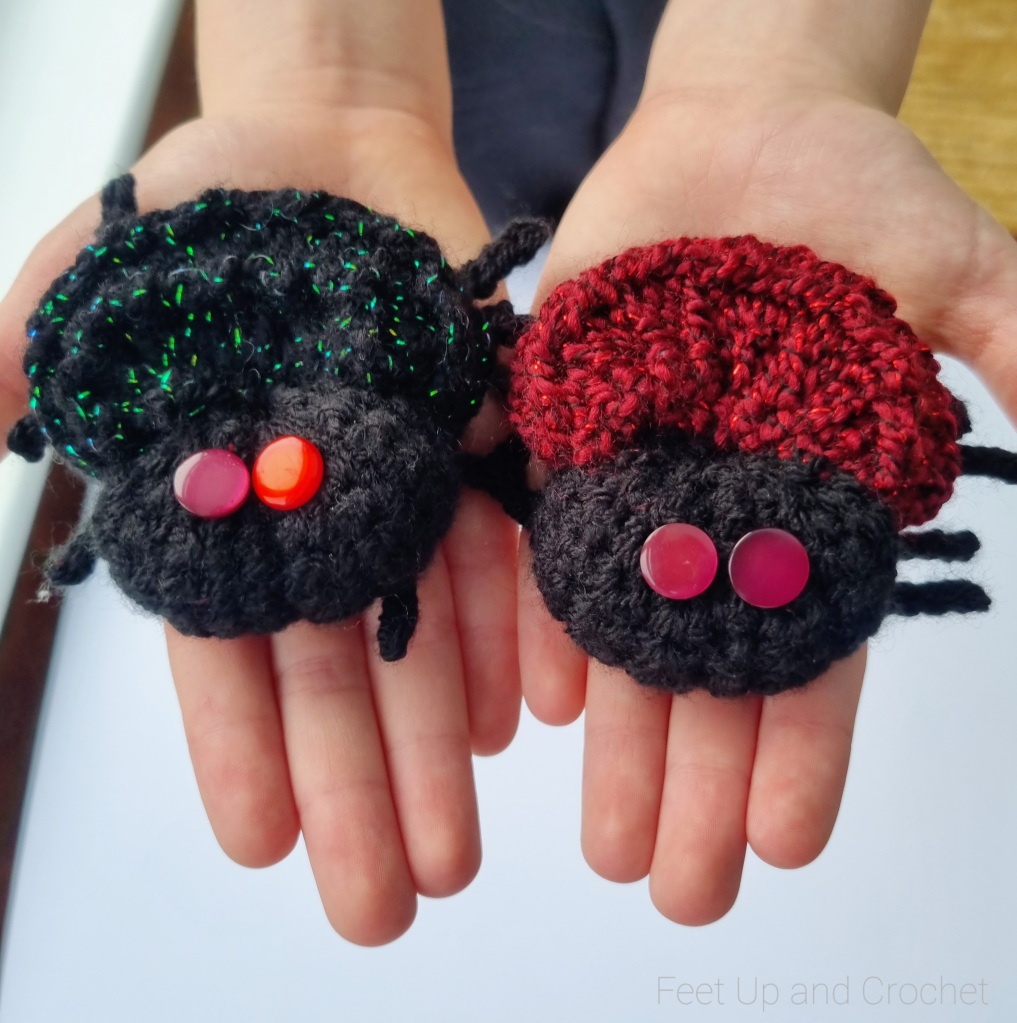
SPIDER INSTRUCTIONS:
(Make 2)
Using black yarn, chain 14.
Row 1 – Ch 1, dc to end. Turn (12)
Row 2-8 – Rep row 1. (12)
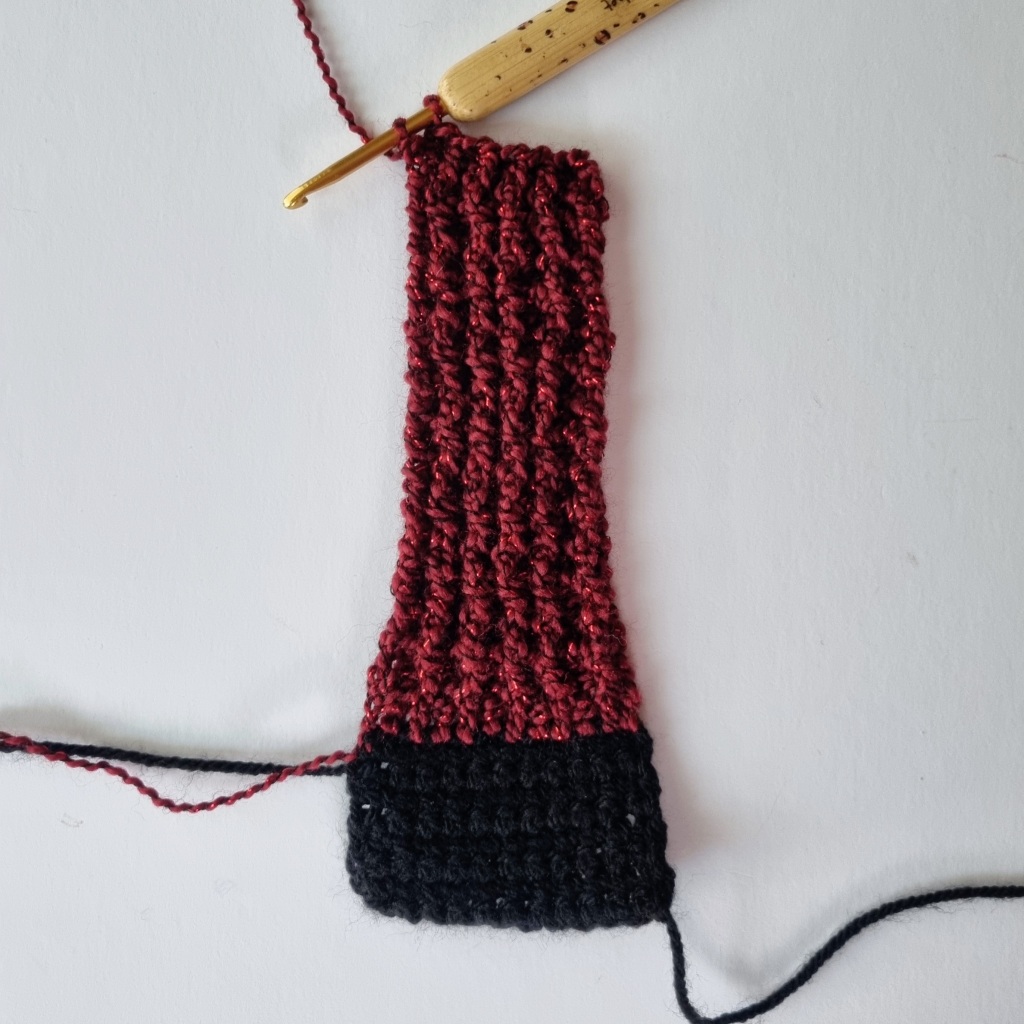
Change to sparkly yarn:
Row 9 – Ch 3, tr to end. Turn. (12)
Row 10 – Ch 3 *(fptr, bptr) rep from * to last st, tr in last st. Turn (12)
Row 11 – 24 – Rep row 10.

Change back to black yarn:
Row 25 – Ch 1, dc to end. Turn (12)
Row 26 – 32 – Rep row 25.
Fasten off leaving a long tail for spider construction.
Repeat for the 2nd spider.
SPIDER CONSTRUCTION:
Make up your spiders as follows:
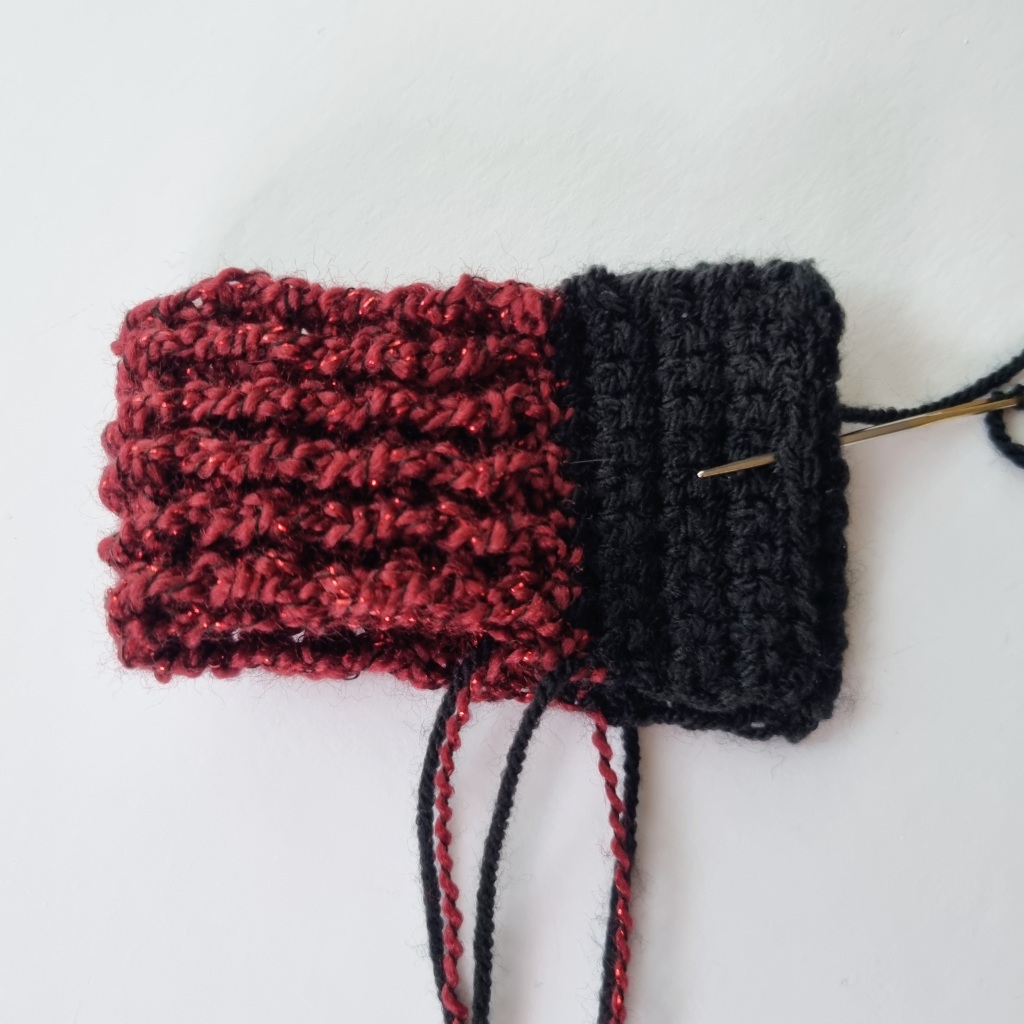
1. Fold the crochet fabric in half lengthways so the short black ends are together. Sew the ends together. Do not fasten off.
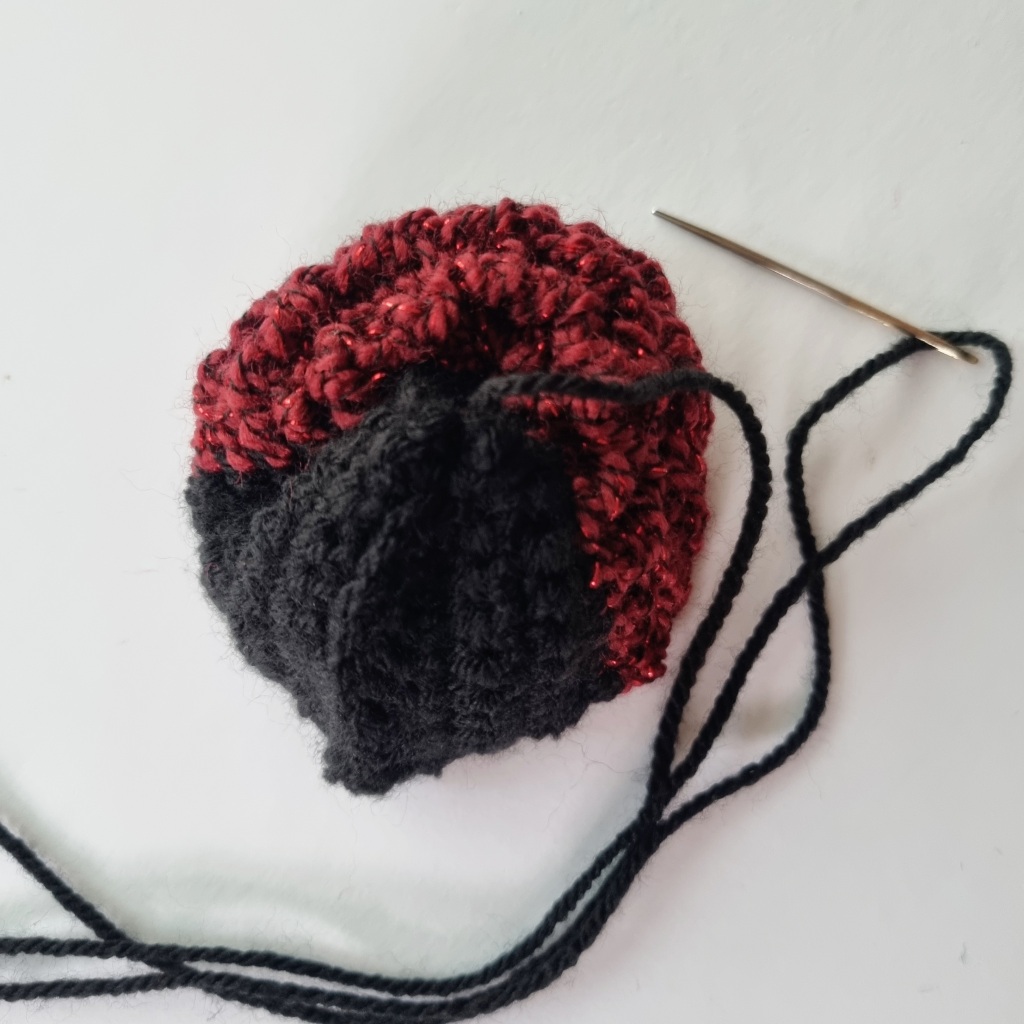
2. Turn the fabric and weave the yarn in and out along one of the long edges. Gently pull the yarn tight until it closes, secure with a couple of stitches. Insert the needle through into the middle of the spider and pull through.
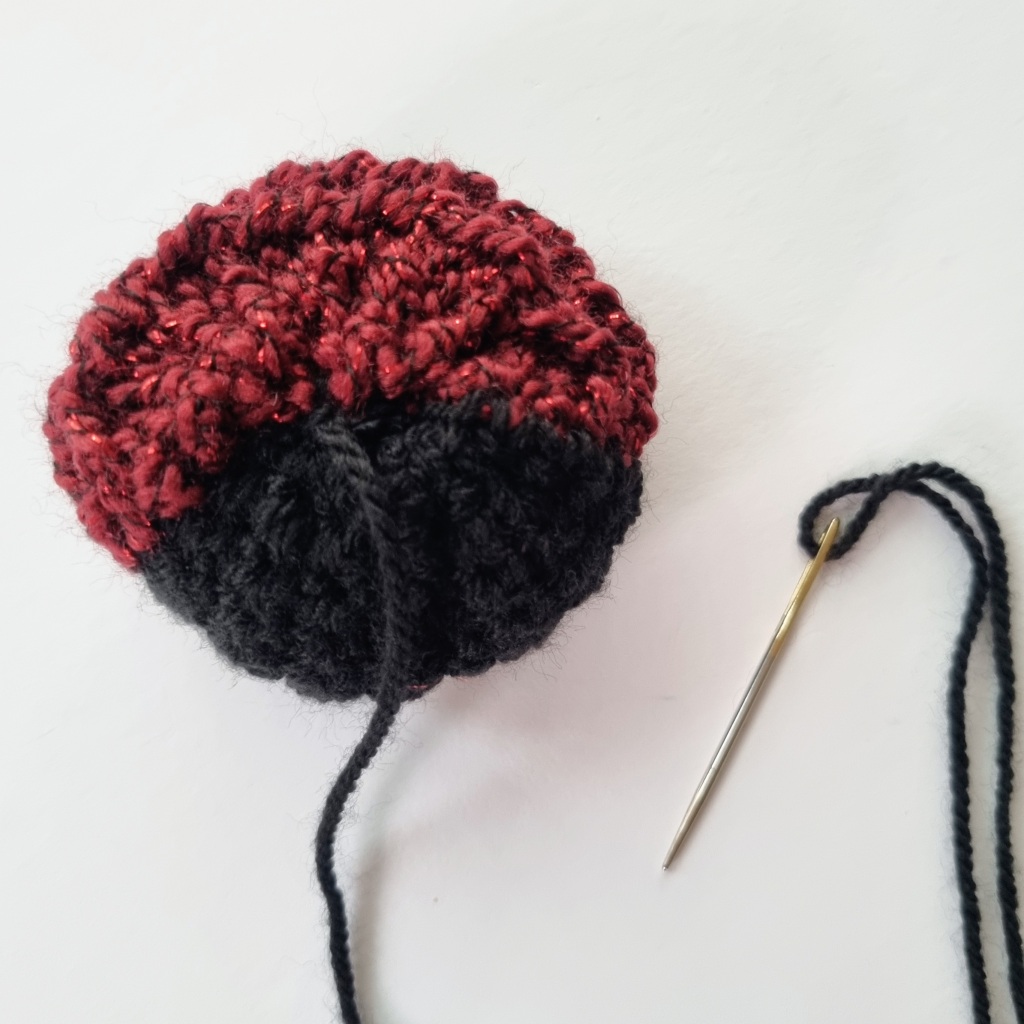
3. Insert a generous amount of stuffing or yarn scraps. Repeat as before to close.
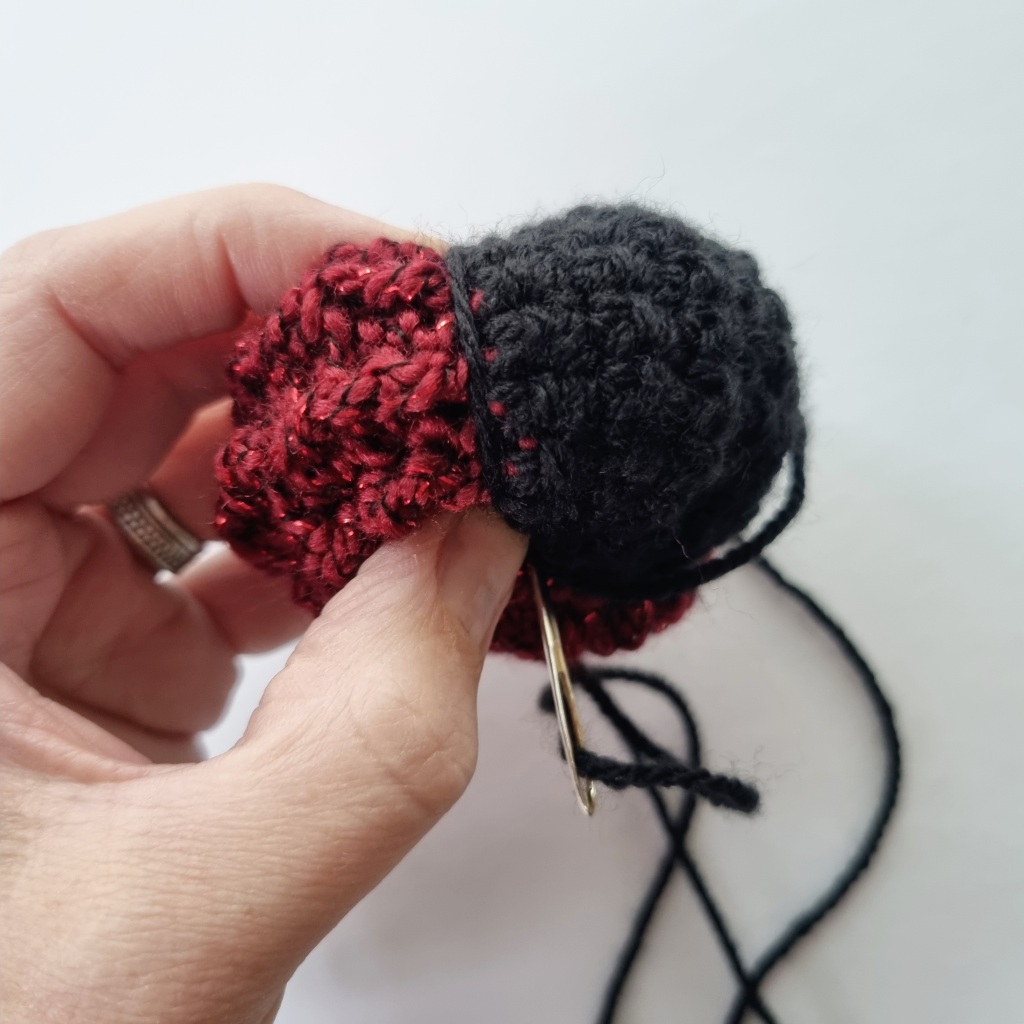
4. To shape your spiders head wrap the yarn round the edge of the black yarn section going round the side and up through the bottom. Repeat for the other side, tightly pulling as you go. Tie securely. Leave a long tail for attaching to the wall hanging.

Now for the legs!
5. Cut a very long length of black yarn for the legs. Ch 7, ss to end (6). Pull the yarn through and tie the ends together.

6. Thread the yarn on the tapestry needle and in the location where you want the back legs pull the yarn through the spider to the other side, making sure the leg does not pull through too.
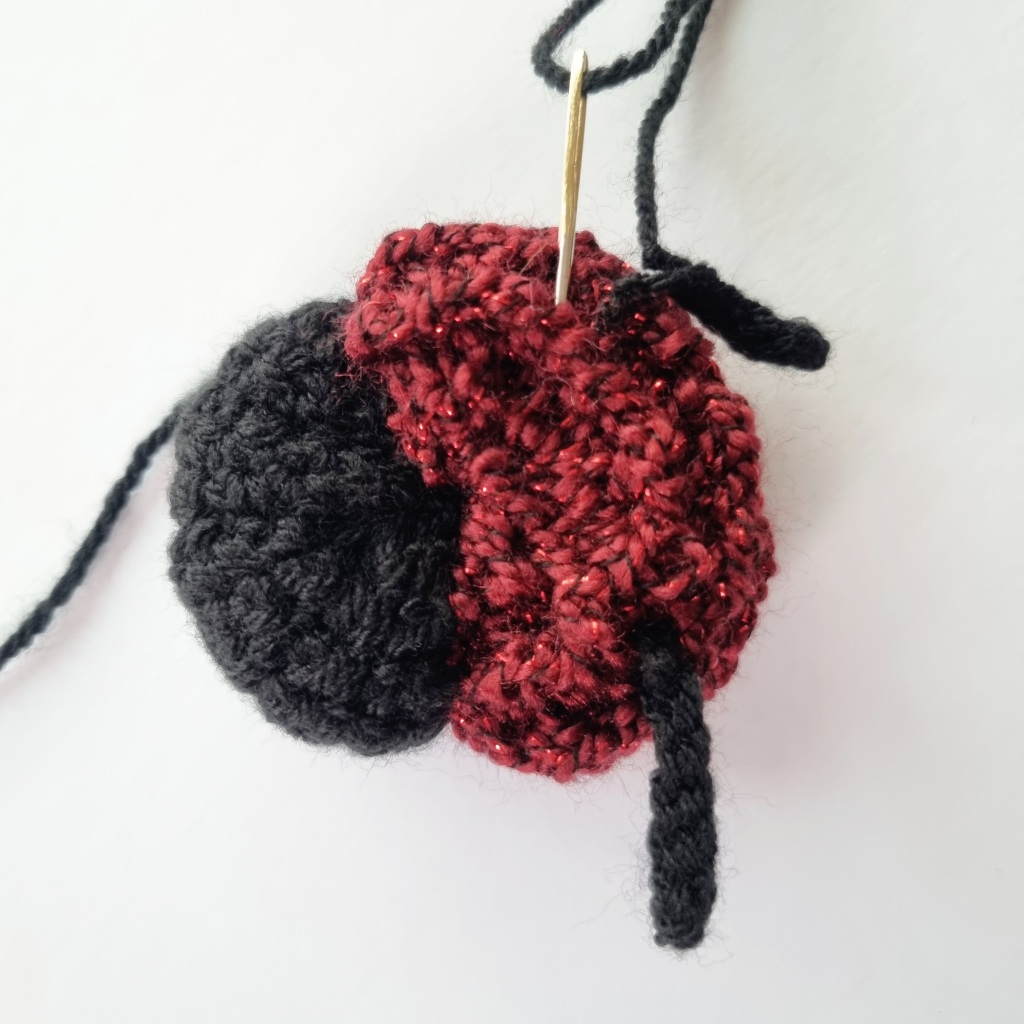
7. Make a slip knot as close the spiders body as you can. Ch 7, ss to end and pull the yarn through. Thread the yarn onto a tapestry needle pull the yarn through the spider to the other side where you want the next set of legs.
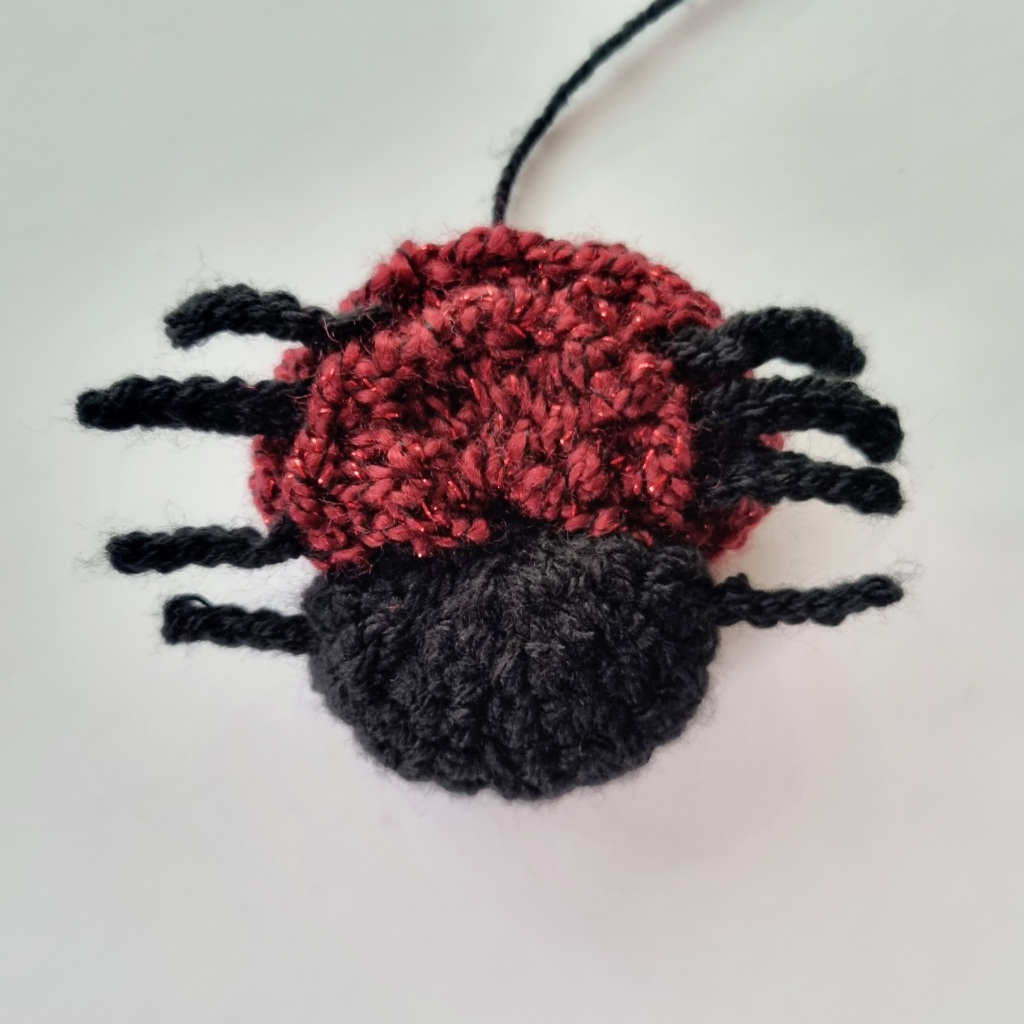
8. Repeat process until you have 8 legs. Fasten off the weave in ends.
9. Attach buttons for eyes.
WEB INSTRUCTIONS:
Using black yarn, make a magic ring.

Rnd 1 – Ch 1, 11 dc into centre of ring, ss to join. (12)
Rnd 2 – Ch 6 (counts as 1 tr and 3 ch), (1 tr, 3 ch) in each dc all around, ss to join. (12 tr).
Rnd 3 – Ch 7 (counts as 1 tr and 4 ch), (1 tr, 4 ch) in each tr all around, ss to join. (12 tr).
Rnd 4 – Ch 8 (counts as 1 tr and 5 ch), (1 tr, 5 ch) in each tr all around, ss to join. (12 tr).
Rnd 5 – Ch 9 (counts as 1 tr and 6 ch), (1 tr, 6 ch) in each tr all around, ss to join. (12 tr).
Rnd 6– Ch 10 (counts as 1 tr and 7 ch), (1 tr, 7 ch) in each tr all around, ss to join. (12 tr).
Rnd 7 – Ch 1, dc all around to edge your web, ss to join.
Cut and pull yarn through and leave a long tail. Thread onto a tapestry needle.

Dont worry if your web looks a bit wonky at this stage!
Attach the yarn to ring by sewing the web firmly onto the ring through every 2 dc. Fasten off.
Ch 20 to make a hanging loop. Tie to the web securely, secure and weave in ends.
TO MAKE TASSELS:
- Cut 72 85cm lengths of yarn.
- Holding 3 lengths at a time, fold in half and using a crochet hook pull the folded end front to back through the gap between the ring and rnd 7. Pull the loop around the back of the craft ring, and pull the ends through the loop and tighten to form a larks head knot.
- Rep to make 24 tassels, attaching them evenly across the bottom of the ring.
- Trim the tassels to desired length.
Attach spiders in their desired position, sew in ends and its finished!
I hope you enjoyed this pattern and if you make it don’t forget to tag me on Instagram with the hashtag #spookyspiderwallhanging so I can see!
Don’t forget to subscribe if you want to keep updated!
Happy crocheting!
Copyright: – Pattern belongs to Katherine Lee and is for personal use only. It must not be reproduced or resold. You may sell items made using this pattern as long as you credit me as the designer. ©Feetupandcrochet 2021
